share this post:
Note: This post may contain affiliate links, meaning that if you make a purchase after clicking on my link I may make a small commission at absolutely no cost to you. These are tools that I use and LOVE.
shop the post

Chantell and I grew up in the same town and have been Instagram friends for a while now. So when she reached out and offered to help me organize my new fridge I was SO excited to work together!
Chantell is the master at making life functional & pretty all at the same time. She was kind enough to share some of her best steps for getting that messy fridge in check and making life in the kitchen a whole lot easier!
Here’s our fridge “pre-Chantell”…it’s just me and Cam so we don’t have a whole lot to fill this huge fridge. If you follow along on Instagram then you already know I’ve eaten a pretty strict diet ever since we started our fertility journey (read more about that stuff here!). With that, we don’t have a whole lot of pre-packaged foods, or foods that have a bunch of preservatives. That means I shop a couple times a week so we always have fresh stuff!
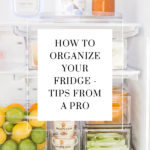
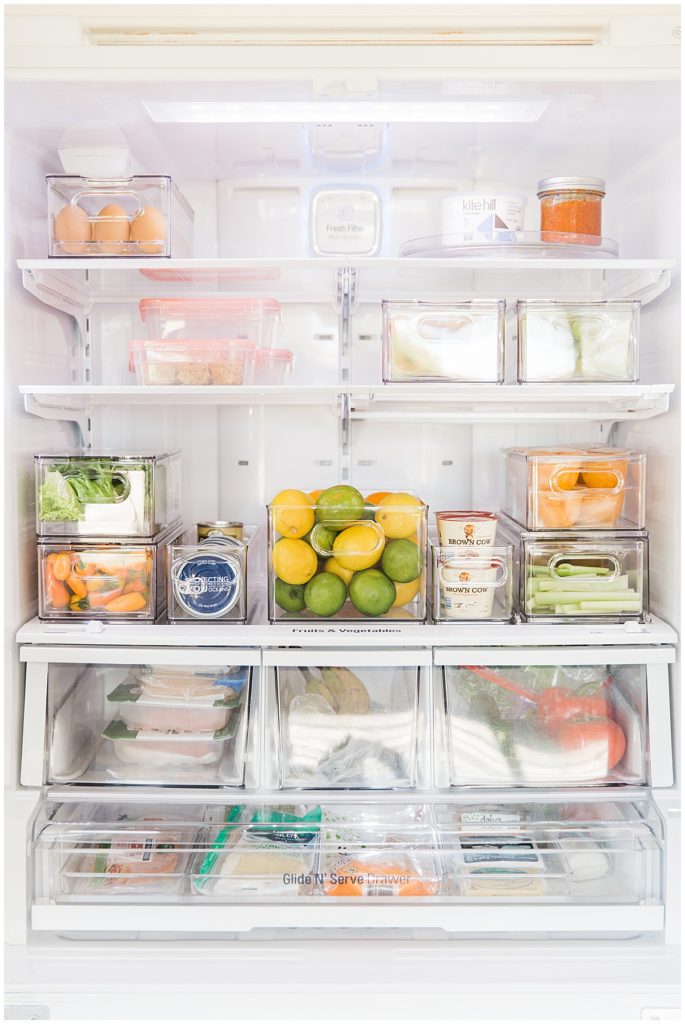
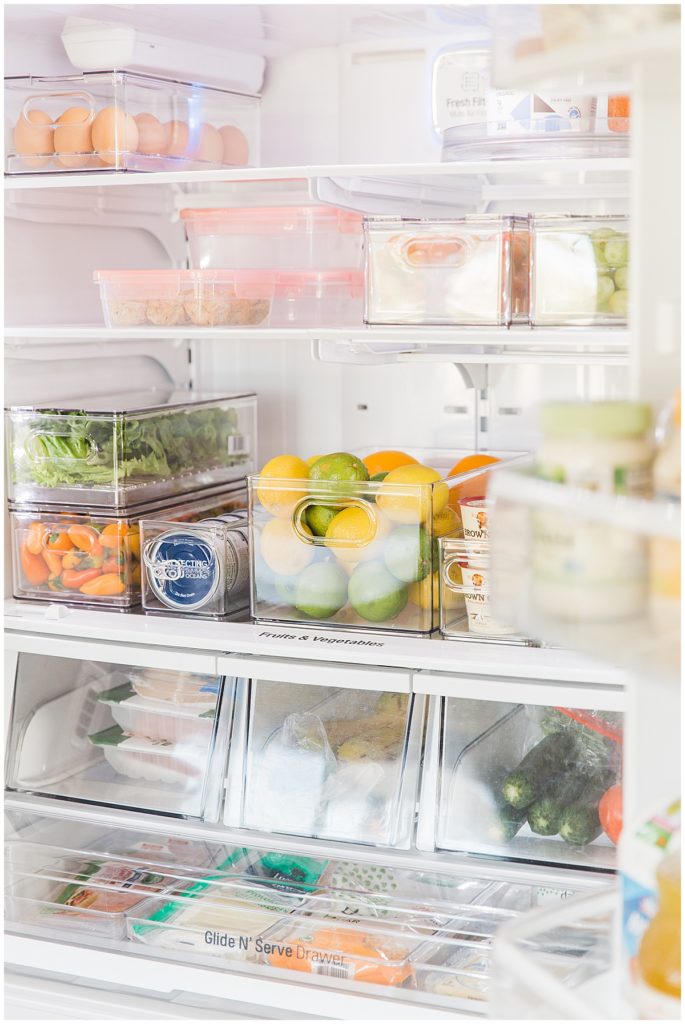
Now, I don’t know about you, but I am 100% guilty of letting food go bad and totally forgetting about it shoved in the back of my fridge. Now, with everything so clean and easy to see, I feel like I can stay on top of what we have vs what we need when I go to the store! Less expired food is always a win in my book because…gross…nobody likes moldy fruit.
Chantell taught me her five steps to a fresh and aesthetically pleasing fridge…here they are!
1. Empty your fridge & give it a good clean
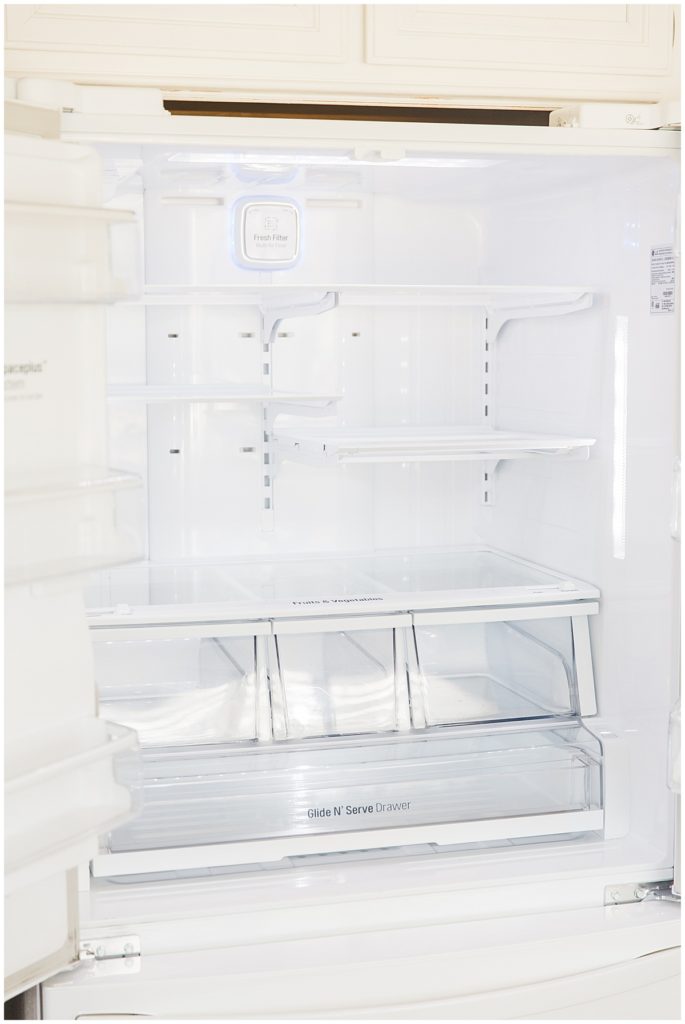
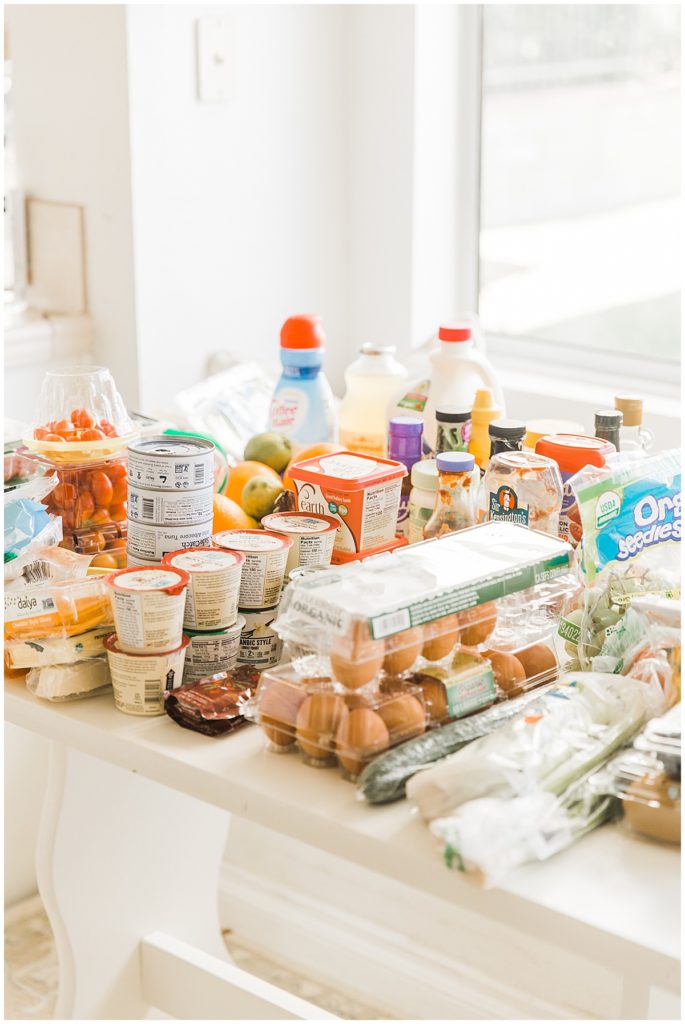
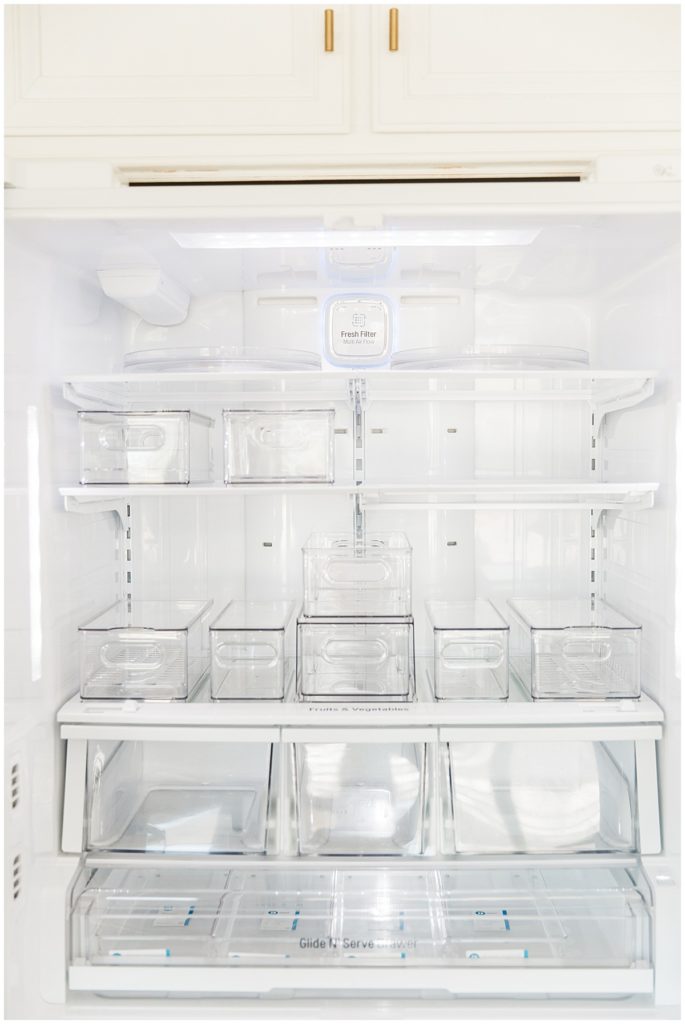
The first thing we did when she got here was throw away any bad food or old leftovers. Then we emptied everything out onto a nearby table (we’ll get to this later!) and wiped down all the shelves and drawers.
2. Categorize all your food
Once your fridge is clean you can focus on the food! You’ll want to categorize all your foods into sections that make sense to you. This can be sections like “fruits, dairy, meats”, or it can be whatever categories make it easier for you to separate them into bins later!
3. Choose containers that work in the space
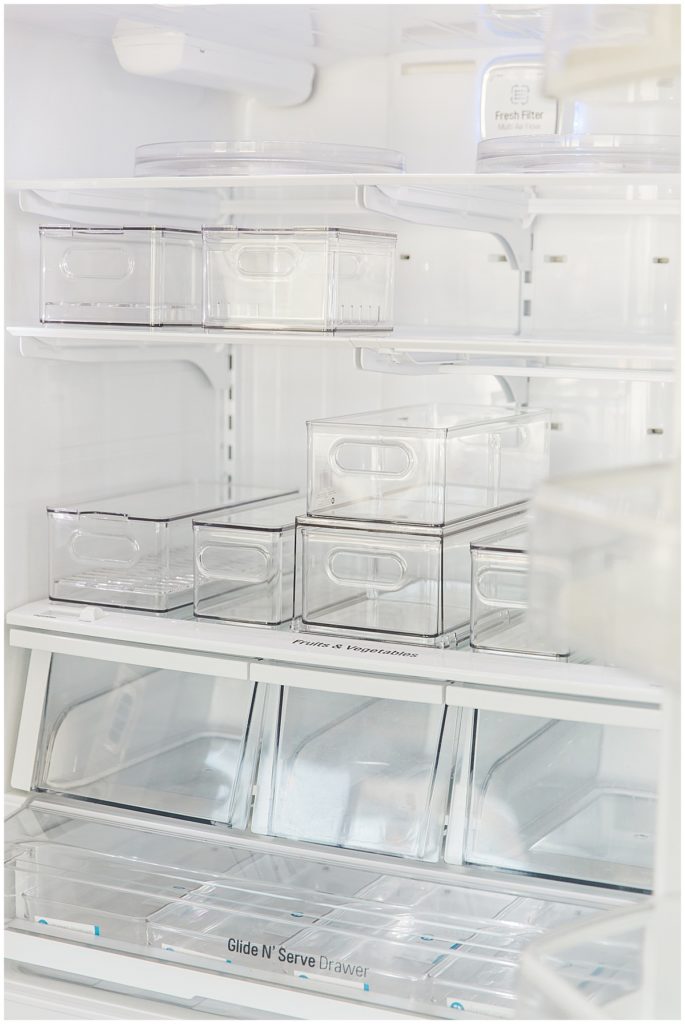
You’ll want to measure your fridges width and depth to make sure the containers you order will fit! I personally like to buy more than I need and play with it while I’m working until I find what works. Then you can return what you don’t use after!
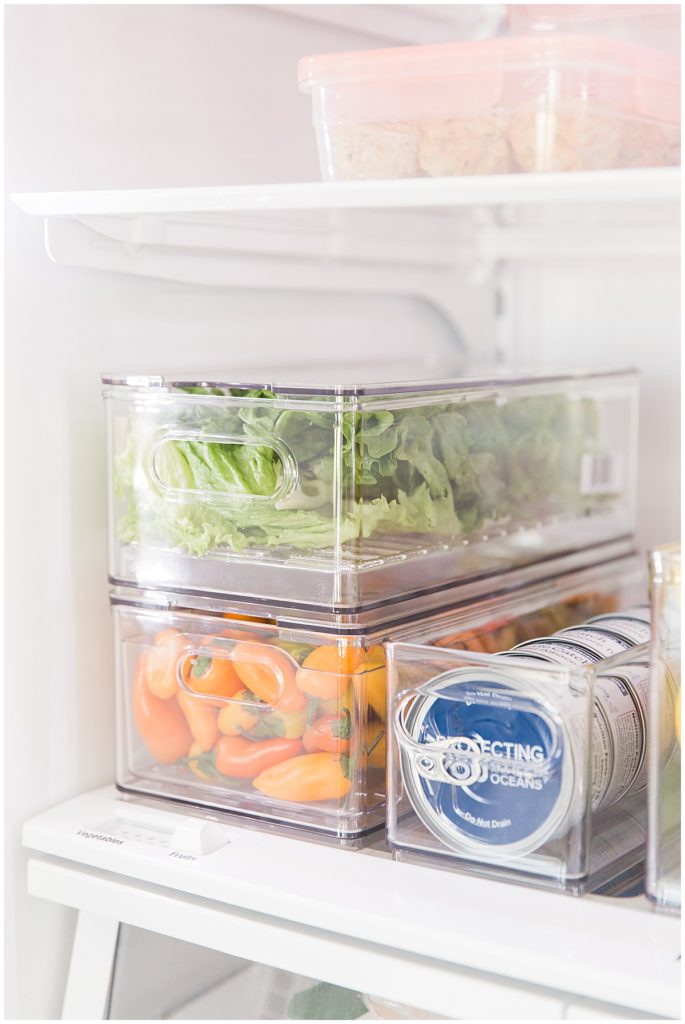
4. Assign foods to containers based on function AND size
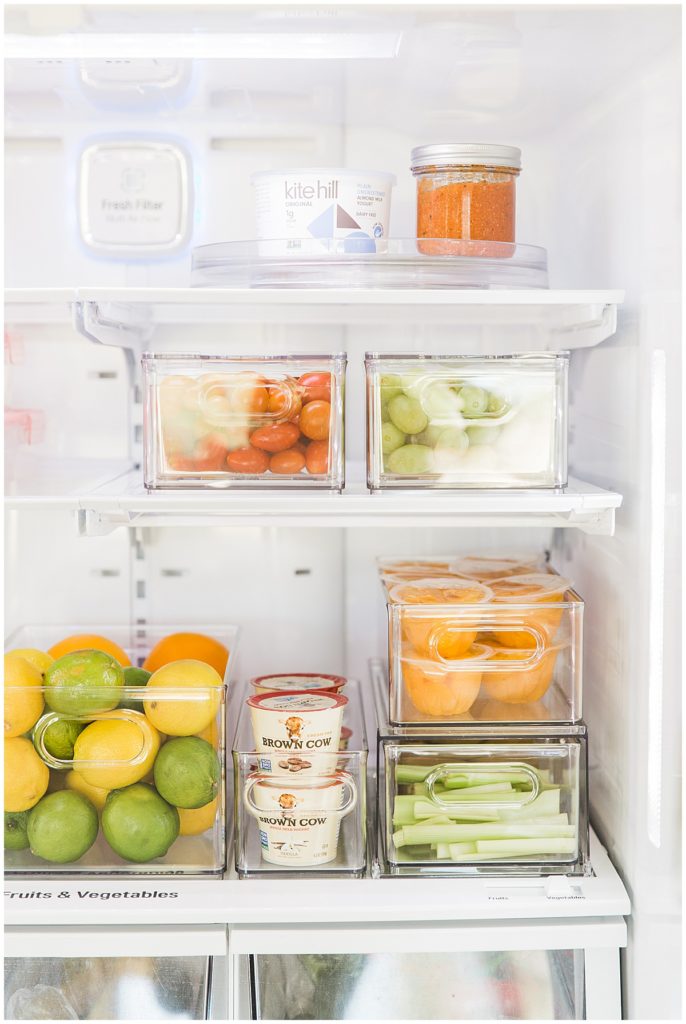
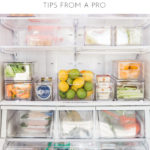
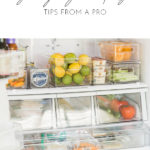
This one is mostly personal preference, but sometimes it can be specific. For instance, we tried to put foods that need to be washed (like cherry tomatoes and lettuce) in the bins that have built in colanders so it’s super functional! You should also be mindful of how much of each food you buy every week. For example, we buy a lot of mini bell peppers and a lot of cherry tomatoes. So we chose larger containers for those, and left the smaller ones for things like berries or grapes which we only buy in smaller quantities.
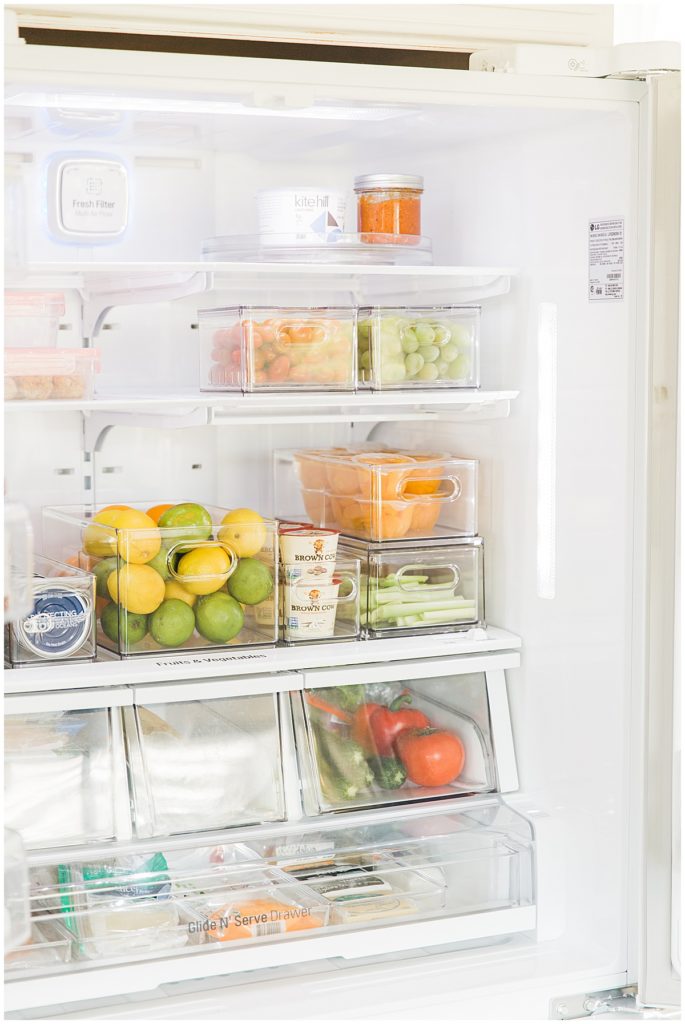
5. Rearrange until you find what works
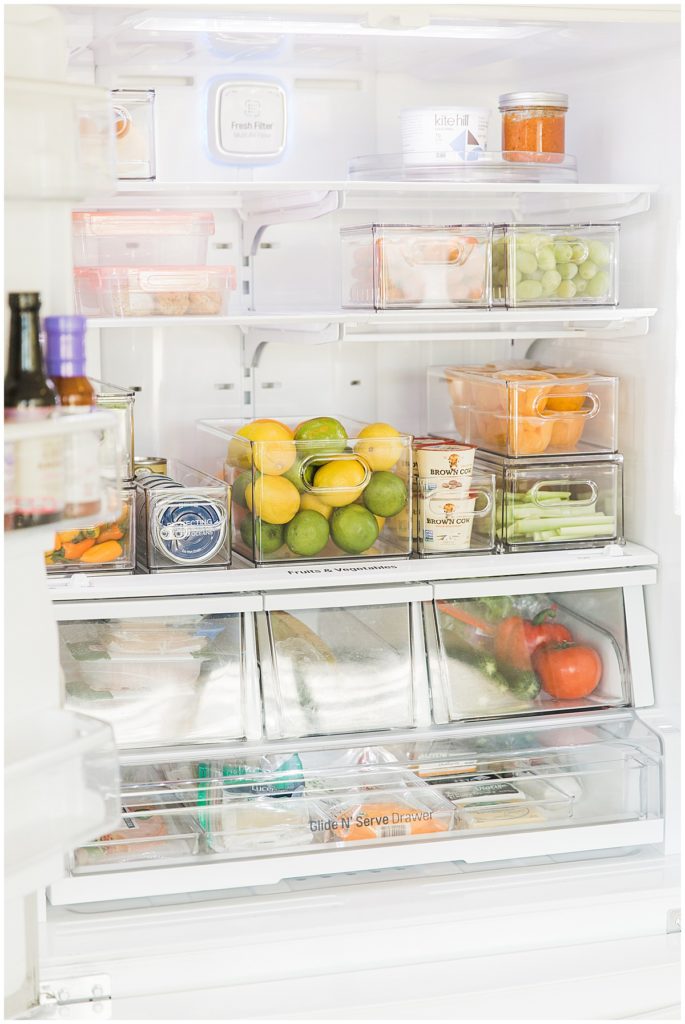
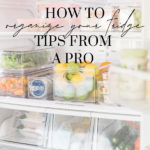
Once you’ve filled all your bins with your food and figured out what fits in which containers, it’s time to put them in their place! The best way to do this is to start placing things, and then just move them around as you see what fits where and how they look all together. Everyone is going to have a different version of what works. For us, we wanted a dedicated section of the fridge for leftovers because we live on those through the week for lunch! I also like to pay attention to the colors of my foods, keeping them balanced and not too much of the same in one spot. That way everything looks pleasing to the eye!
A few extra tips from the pro!
1. Go grocery shopping before organizing so you know what you frequently have and can adjust as such.
2. Lazy Susan is a must! Keeps you from having to stack things behind each other and grab around them.
3. Organizing this way saves you money because you aren’t overbuying things since you can always see what you have!
4. Store your meat separate to avoid cross contamination
5. Don’t be afraid to adjust your shelves!
6. Divide your meat and cheese drawer into sections with narrow containers…keeps things neat and tidy instead of just a mess of stuff in a drawer!
7. Make a list of all the foods you buy consistently before you start so you have a general idea and can make sure you know what to buy beforehand!
That’s it! I’m so grateful for Chantell and all that she taught me today! It was so fun and my fridge has NEVER looked this good! If you’re looking to work with a professional organizer to whip your stuff into shape in the new year, definitely reach out to Chantell on Instagram or visit her site here!
shop the post


i'd love to hear them!
have some thoughts?