share this post:
Note: This post may contain affiliate links, meaning that if you make a purchase after clicking on my link I may make a small commission at absolutely no cost to you. These are tools that I use and LOVE.
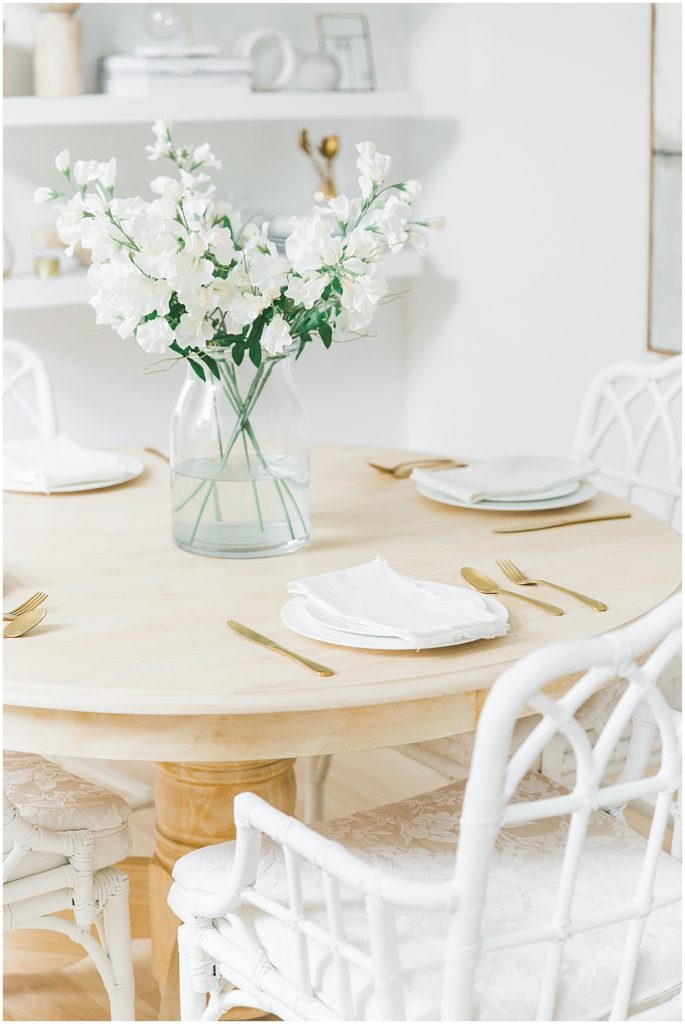
So if you haven’t seen our dining room reveal, be sure to check that out here! Then come back and read this post all about how we got that dining set for $100 and transformed it into what it is today!
If you don’t already know, we found our dining table on Facebook Marketplace for $25! It also came with 6 matching chairs that I turned around and resold for $25, so it ended up being free! If you aren’t part of local buy/sell home decor groups on facebook yet, you are missing out! Seriously, just like open a new tab right now and join one (or five) and thank me later! The chairs were also found on the marketplace. We paid $75 total for all four and they were an espresso brown color…not my vibe…but chippendale chairs go for LITERALLY $400-$900 EACH. I really couldn’t pass it up!
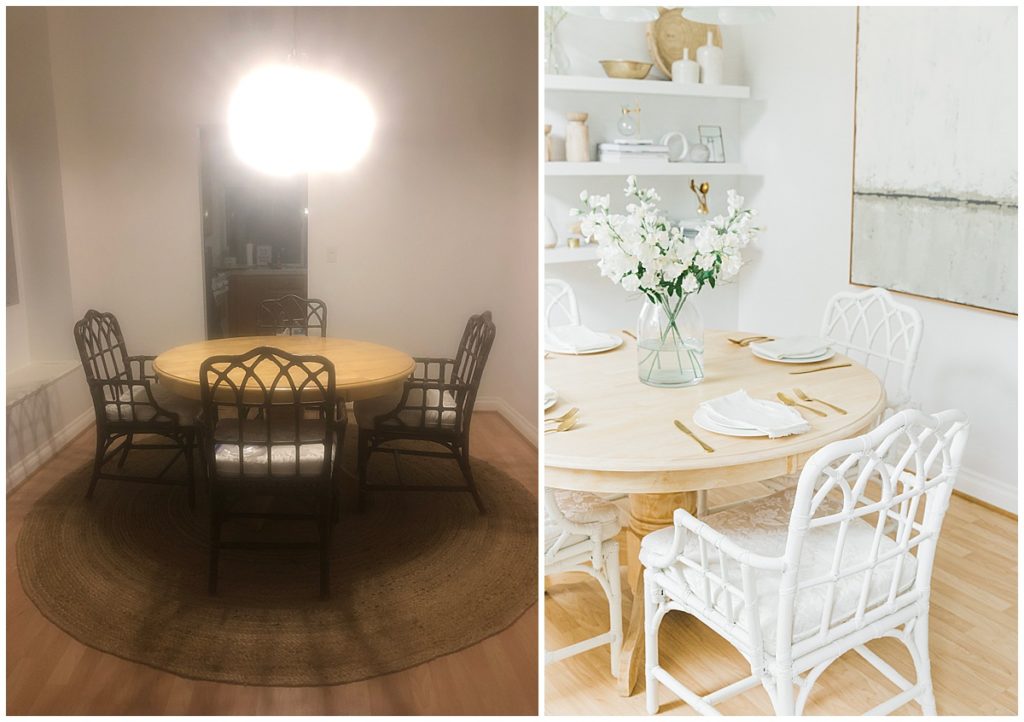
I wish I had better before photos of this guys, I really do. I am working on remembering to take good before photos, I just get so excited to start a project that I always skip over that step! But I’m showing you all I got here and it’s still a pretty crazy transformation.
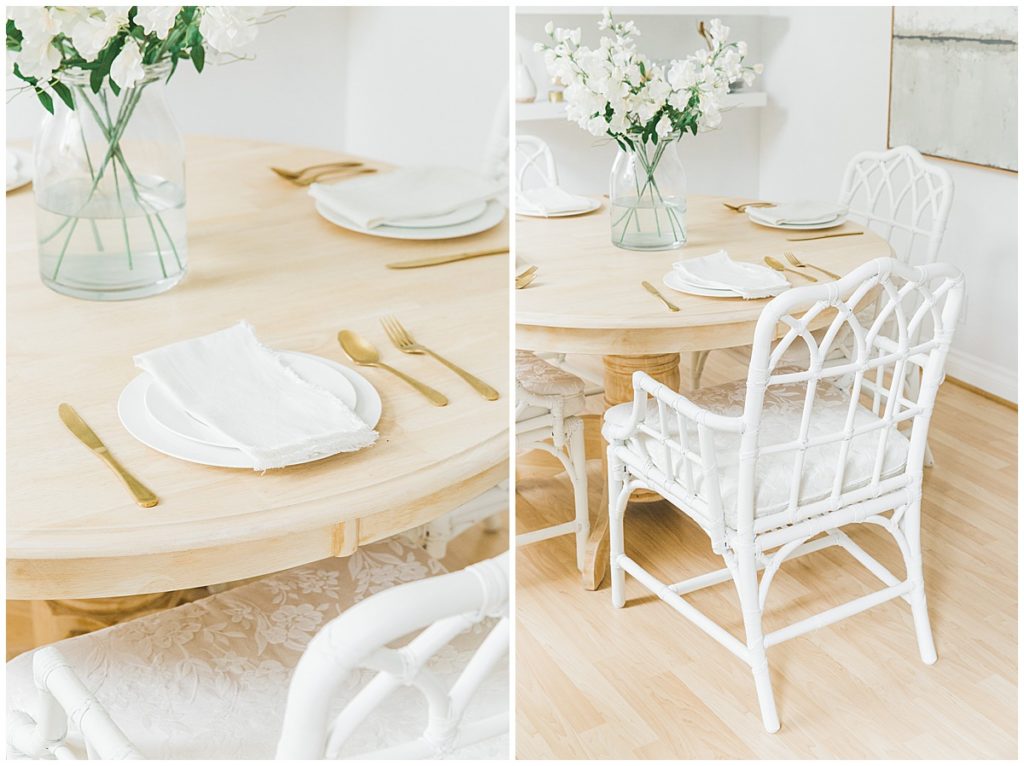
If you’re looking to do a little DIY dining project of your own, here’s a little rundown on everything we did for this transformation!
For The Table:
- Wiped down the entire surface with a damp paper towel
- Get out the handy dandy electric sander (trust me, don’t do this by hand) and sand down the ENTIRE table as best as you can.
- Take a break (we literally did this over like 5 days because sanding is tedious and exhausting)
- Brush on a protective top coat
Notes :
- Every type of wood is going to look different when it’s sanded down to raw. Our table is pine. I wish it was oak because I personally love the gray tones in oak better than the yellow tones in pine.
- You can add a coat of white wash over the top to tone down the yellows if you feel it’s necessary.
- Sanding the stain off of a table will likely never ever be perfect and even. I spent so much time sanding over and over the same spot trying to even the tone and it just wasn’t happening. It worked out once I accepted the imperfect worn vibe.
- DON’T SKIP THE TOP COAT. Seriously don’t do. I’ve done it, learn from my mistakes.
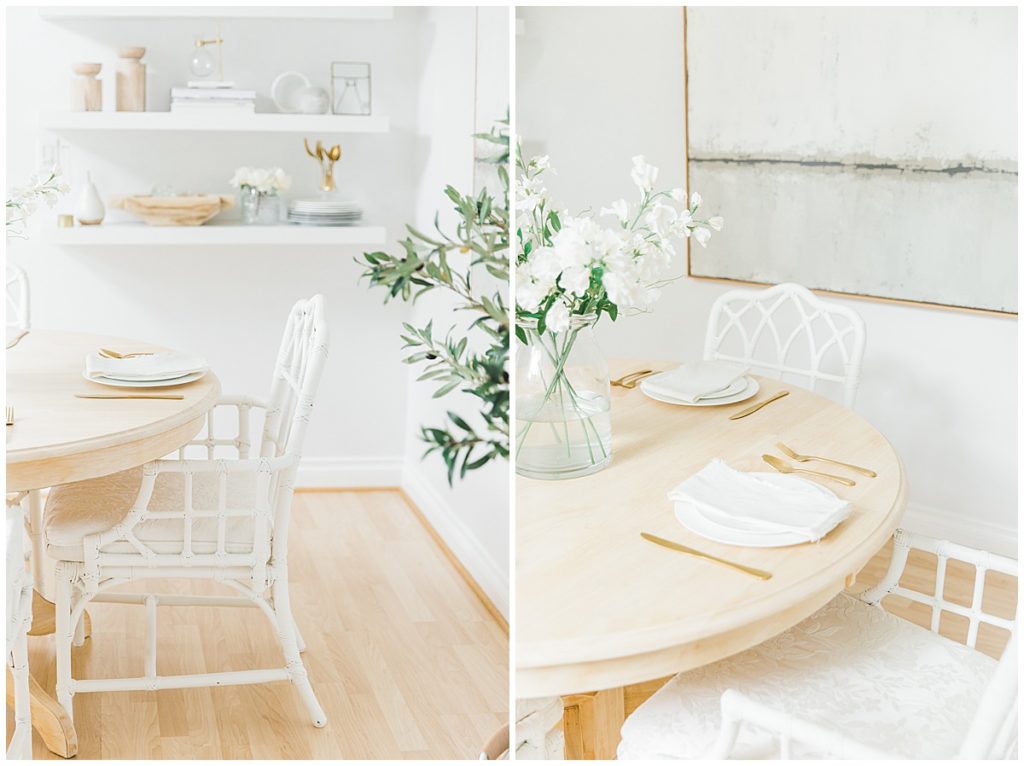
Truthfully when I started this project I had a different vision in mind. But I think anyone whose done DIY stuff before can attest to the fact that it usually ends up different than you planned. Regardless, we love how it came together in the end and I hope you do too!
Got questions about your own DIY? Leave a comment, or send me a DM on INSTAGRAM, I am happy to help!
Don’t forget to pin this for later!
SHOP THE LOOK


i'd love to hear them!
have some thoughts?